An email server on Debian 12
This and following tutorials cover how to set up an email server with web interface. This part covers the technical details to enable receiving emails from others and sending email from the server. The second and third tutorials cover how to relay email from end users and set up webmail interface, respectively.
An advantage of using your own mail server is that you can easily set up a contact form and let users send email to you from there.
The minimum hardware required to install and run email server is: 1 VCPU, 1 GB of RAM and 3 GB of disk space.1. Opening ports
To set up a mail server, you'll need to open specific ports to allow incoming and outgoing mail traffic. The ports you need to open depend on the email protocols you plan to use. The most common email protocols are SMTP (Simple Mail Transfer Protocol) for sending emails and IMAP (Internet Message Access Protocol) or POP3 (Post Office Protocol) for receiving emails. Here are the ports typically associated with these protocols:SMTP:
Port 25: This is the default port for SMTP. It's used for outgoing mail (sending emails).IMAP:
Port 143: This is the default port for IMAP, which is used for receiving emails. It's not secure and is typically used with STARTTLS or SSL/TLS encryption.Port 993: This is the secure IMAP port, which is used when IMAPS (IMAP over SSL/TLS) encryption is employed.
POP3:Port 110: This is the default port for POP3, used for receiving emails without encryption.
Port 995: This is the secure POP3 port, used when POP3S (POP3 over SSL/TLS) encryption is employed.In this tutorial, we only use SMTP and IMAP, so need to open the following ports:
- SMTP (inbound): Port 25, Port 587 for secure email submission by clients
- IMAP (inbound): Port 143, Port 993 (Optional. With SSL/TLS)
- SMTP (outbound): Port 25 (Optional. It is blocked by many cloud providers. Hetzer will unblock it after 1 month.)
Go to your web portal and open the above ports. Additionally, Open HTTP (inbound): Port 80 and HTTPS (inbound): Port 443 for web service.
2. Installation of software
The following tutorial is for PostgreSQL on Debian 12. For MariaDB on Debian 11, refer to an email server on Debian 11.
On Linux, install a series of software: pwgen (generates random password), PostgreSQL server (database management system), postfix (mail server), Apache and PHP (web server), swaks (test email delivery), and mutt (view email in command line). Additional software to store email is dovecot.
pwgen
Let’s start with the pwgen utility. It helps you create secure passwords. Unless you already have a tool for that…sudo apt install -y pwgen
You will need a random password later to create a database user for the mail server. Just as an example: to create a secure password having a length of 20 characters you would run:pwgen -s 20 1
That gets you a string like “W2EzNUFJzjEmA8tQT7A0”.PostgreSQL server
You can access the database server without any password if you are logged in as ‘postgres’ on the server. You might as well set a password but it is not necessary.Go install the PostgreSQL server package:
sudo apt install -y postgresql-contrib-15 postgresql-15 postgresql-client-15
If all went well you can now run “sudo -u postgres -i” to switch to postgres user and then "psql" to connect to your PostgreSQL database:
    psql (15.15 (Debian 15.15-1.pgdg12+1))
    Type "help" for help.

    postgres=#
Exit the SQL shell by typing “\q” or pressing CTRL-D. Type "exit" to switch back to sudo user.
Postfix
As an example, I will assume that you want to offer a host name webmail.example.org to your users. Of course, your server will have another name in a domain that you control. I will use that example throughout the tutorial though and keep that name printed in bold letters to remind you that you have to use your own host name.
Do you just want to play around with your new server and not use an independent domain yet? No problem. Then you can set your DNS name label with nip.io or Azure portal, which will create a subdomain for your website. If you have an independent domain then set up a DNS “A” and “AAAA” (if you use IPv6) record for that host name pointing to your server’s IP address.
Change your mail server to a fully qualified domain and add the name to your etc/hosts file:
#Replace subdomain.example.com with your hostname
sudo hostnamectl set-hostname subdomain.example.com
#Edit etc/hosts with your hostname and IP. Replace 192.168.1.10 with your IP.
echo "192.168.1.10 subdomain.example.com subdomain" | sudo tee -a /etc/hosts > /dev/null
sudo apt install postfix
sudo apt install postfix-pgsql
When you get asked for the mail server configuration type please choose “Internet site”. Enter your own mail server name (the fully qualified domain name) or just press enter. The host name and domain does not need to match any of your email domains.
Apache and PHP
To provide a webmail service you need the Apache web server software and the PHP scripting language support:sudo apt install -y apache2 php
swaks
A very useful tool to test email delivery later is SWAKS (the SWiss Army Knife for Smtp):sudo apt install -y swaks
mutt
This is a full-featured IMAP mail client. Think of it as the vi of mail clients. It cannot display HTML but it is very helpful to test IMAP mail servers. And some hardcore users still prefer it over any other mail client.sudo apt install -y mutt
Dovecot
In addition to Postfix (that handles SMTP communication) you will need Dovecot to store received emails and provide IMAP (and optionally POP3) access for your users:sudo apt install -y dovecot-pgsql dovecot-pop3d dovecot-imapd dovecot-managesieved dovecot-lmtpd
3. Preparing the Apache web server for HTTP
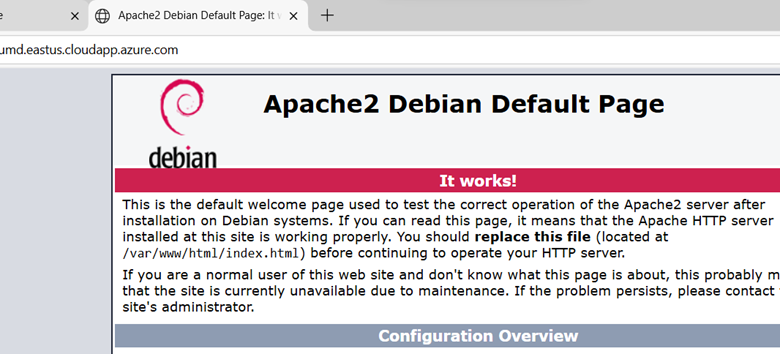
Open a web browser, and go to the DNS name of your website. You should see something like this:
First you need a web root directory for that host name:
sudo mkdir /var/www/webmail.example.org
sudo chown www-data:www-data /var/www/webmail.example.org
- /etc/apache2/sites-available/*.conf contains the actual configuration files for each virtual host. Putting a file here does not enable that host though. That’s done in the next step. There are two configuration files by default. “000-default.conf” is a HTTP virtual host and “default-ssl.conf” is a HTTPS virtual host.
- /etc/apache2/sites-enabled/*.conf contains symbolic links (“symlinks”) pointing to configuration files in the /etc/apache2/sites-available directory. Only *.conf links in this directory will be loaded by Apache.
You may remove the default symlinks in /etc/apache2/sites-enabled/* unless you use them already.
Create a new virtual host configuration file /etc/apache2/sites-available/webmail.example.org-http.conf and make it contain:
<VirtualHost *:80>
ServerName webmail.example.org
DocumentRoot /var/www/webmail.example.org
</VirtualHost>
Enable the site:
sudo a2ensite webmail.example.org-http
You will be told:
        To activate the new configuration, you need to run:
         systemctl reload apache2
You may need to add sudo at the beginning: sudo systemctl reload apache2
4. Getting a Let's Encrypt certificate
There are many ways to install Let's Encrypt certificate. The following way is the Linux (apt) way:sudo apt update
sudo apt install certbot
Since we are using Apache web server, we also need to install the Apache plugin.
sudo apt install python3-certbot-apache
Certbot provides a variety of ways to obtain SSL certificates through plugins. The Apache plugin will take care of reconfiguring Apache and reloading the configuration whenever necessary. To use this plugin, run the following:sudo certbot --apache --agree-tos --email your-account@example.com -d webmail.your-domain.com
This runs certbot with the --apache plugin, using -d to specify the names for which you’d like the certificate to be valid. After doing so, certbot will communicate with the Let’s Encrypt server, then run a challenge to verify that you control the domain you’re requesting a certificate for.If that’s successful, the configuration will be updated automatically and Apache will reload to pick up the new settings. certbot will wrap up with a message telling you the process was successful and where your certificates are stored:
Successfully received certificate.
Certificate is saved at: /etc/letsencrypt/live/umd.eastus.cloudapp.azure.com/fullchain.pem
Key is saved at:         /etc/letsencrypt/live/umd.eastus.cloudapp.azure.com/privkey.pem
This certificate expires on 2025-09-18.
These files will be updated when the certificate renews.
Certbot has set up a scheduled task to automatically renew this certificate in the background.

Deploying certificate
Successfully deployed certificate for umd.eastus.cloudapp.azure.com to
/etc/apache2/sites-available/umd.eastus.cloudapp.azure.com-http-le-ssl.conf
Congratulations! You have successfully enabled HTTPS on https://umd.eastus.cloudapp.azure.com

- - - - - - - - - - - - - - - - - - - - - - - - - - - - - - - - - - - - - - - -
If you like Certbot, please consider supporting our work by:
 * Donating to ISRG / Let's Encrypt:   https://letsencrypt.org/donate
 * Donating to EFF:                    https://eff.org/donate-le
- - - - - - - - - - - - - - - - - - - - - - - - - - - - - - - - - - - - - - - -
Your certificates are downloaded, installed, and loaded. Try reloading your website using https:// and notice your browser’s security indicator. It should indicate that the site is properly secured, usually with a green lock icon. If you test your server using the SSL Labs Server Test, it will get an A grade.
Let’s finish by testing the renewal process.Verifying Certbot automatic renewal
Let’s Encrypt certificates are only valid for ninety days. This is to encourage users to automate their certificate renewal process. The certbot package you installed takes care of this for you by adding a renew script to /etc/cron.d. This script runs twice a day and will automatically renew any certificate that’s within thirty days of expiration.To test the renewal process, you can do a dry run with certbot:
sudo certbot renew --dry-run
If you receive no errors, you’re all set. When necessary, Certbot will renew your certificates and reload Apache to pick up the changes. If the automated renewal process ever fails, Let’s Encrypt will send a message to the email you specified, warning you when your certificate is about to expire.5. Preparing the database
Now it’s time to prepare the PostgreSQL database that stores the information that controls your mail server. In the process you will have to enter SQL queries – the language of relational database servers. You may enter them in a terminal window using the ‘psql’ command.Generate two random passwords
In this section you will create the basic database “mailserver” and two users. One user (“mailadmin”) will be able to change the data in the database and is meant for you. The other user (“mailserver”) can only read from the database and is meant for the server processes.
Use the pwgen tool to create two random passwords for these users:pwgen -s1 30 2
Take a note of the passwords or store them somewhere safe.Create the ‘mailserver’ database
This step is simple. Connect to the database using the ‘psql’ command:sudo -u postgres -i
psql
postgres=#
Now you are expected to speak SQL. To create a new database for our needs. Enter:CREATE DATABASE mailserver;
You will be told that your query was OK and that one new row was added.Create the database users
Now you have an empty database. Let us give the “mailadmin” database user the required privileges to manage it.You are still connected to the database, right? To create a user with full permissions enter this SQL command. Please use the first password you just generated instead of mine:
CREATE USER mailadmin WITH ENCRYPTED PASSWORD 'E2zhrYD1156RtbPRgWLfU4uC0uCQ0g';
GRANT ALL PRIVILEGES ON DATABASE mailserver TO mailadmin;
Also create the read-only user that will grant Postfix and Dovecot database access later (use your second random password here).
CREATE USER mailserver WITH ENCRYPTED PASSWORD 'uoDFE981mMpM0X996QNirfq4rJJ5ZR';
GRANT CONNECT ON DATABASE mailserver TO mailserver;
\c mailserver
GRANT SELECT ON ALL TABLES IN SCHEMA public TO mailserver;
ALTER DEFAULT PRIVILEGES IN SCHEMA public GRANT SELECT ON TABLES TO mailserver;
Optionally, verify the user's access by attempting to log in with the new credentials:psql -h localhost -U mailserver -d mailserver
Creating the database tables
We need three Postfix mappings. One for virtual domains, one for virtual aliases and another for virtual users. Each of the mappings needs a database table that you will create now. Feel free to use Adminer. I will however show the SQL statement to create the tables that you can enter on the ‘psql’ command-line tool. The first table to create is virtual_domains.This table just holds the list of domains that you will use as virtual_mailbox_domains in Postfix.
\connect mailserver;
CREATE TABLE virtual_domains (
id SERIAL PRIMARY KEY,
name varchar(50) NOT NULL
);
CREATE TABLE virtual_users (
id SERIAL PRIMARY KEY,
domain_id int NOT NULL,
email varchar(100) UNIQUE,
password varchar(150) NOT NULL,
quota bigint NOT NULL DEFAULT 0,
FOREIGN KEY (domain_id) REFERENCES virtual_domains(id) ON DELETE CASCADE
);
CREATE TABLE virtual_aliases (
id SERIAL PRIMARY KEY,
domain_id int NOT NULL,
source varchar(100) NOT NULL,
destination varchar(100) NOT NULL,
FOREIGN KEY (domain_id) REFERENCES virtual_domains(id) ON DELETE CASCADE
);
Example data to play with
Too much theory so far? I can imagine. Let’s populate the database with an example.org domain, a john@example.org email account and a forwarding of jack@example.org to john@example.org. We will use that information in Section 6: Let Postfix access PostgreSQL.To add that sample data just run these SQL queries:
\connect mailserver;
INSERT INTO virtual_domains (id,name) VALUES (1,'example.org');
INSERT INTO virtual_users (id,domain_id,password,email)
VALUES (1, 1,
'{BLF-CRYPT}$2y$05$xAEZd6RSftRCRKWuGwbc4.2HR/RFI5JwMFpymE/.TWZXWUp1.Krqi',
'john@example.org');
INSERT INTO virtual_aliases (id,domain_id,source,destination)
VALUES (1, 1, 'jack@example.org', 'john@example.org');
sudo doveadm pw -s BLF-CRYPT
…to create a secure hash of the simple password “summersun”. Once you have installed Dovecot you can try that yourself but you will get a different output. The reason is that the passwords are salted to increase their security.6. Let Postfix access PostgreSQL
In section 5, you have created the SQL database schema and inserted some data to play with. Let’s start with the entry point for all email on your system: Postfix. So, we need to tell Postfix how to get the information from the database. First let’s tell it how to find out if a certain domain is a valid email domain.virtual_mailbox_domains
A mapping in Postfix is just a table that contains a left-hand side (LHS) and a right-hand side (RHS). To make Postfix get information about virtual domains from the database we need to create a ‘cf’ file (configuration file). Start by creating a file called /etc/postfix/pgsql-virtual-mailbox-domains.cf for the virtual_mailbox_domains mapping. Make it contain:
user = mailserver
password = uoDFE981mMpM0X996QNirfq4rJJ5ZR
hosts = 127.0.0.1
dbname = mailserver
query = SELECT 1 FROM virtual_domains WHERE name=‘%s’
Imagine that Postfix receives an email for somebody@example.org and wants to find out if example.org is a virtual mailbox domain. It will run the above SQL query and replace ‘%s’ by ‘example.org’. If it finds such a row in the virtual_domains table it will return a ‘1’. Actually, it does not matter what exactly is returned as long as there is a result.
Now you need to make Postfix use this database mapping:sudo postconf virtual_mailbox_domains=pgsql:/etc/postfix/pgsql-virtual-mailbox-domains.cf
The “postconf” command conveniently adds configuration lines to your /etc/postfix/main.cf file. It also activates the new setting instantly so you do not have to reload the Postfix process.Connect to your PostgreSQL database using a user with administrative privileges (like the default postgres user).
sudo -u postgres psql
\connect mailserver
GRANT SELECT ON virtual_aliases TO mailserver;
GRANT SELECT ON virtual_domains TO mailserver;
GRANT SELECT ON virtual_users TO mailserver;
GRANT ALL PRIVILEGES ON virtual_users TO mailadmin;
sudo postmap -q example.org pgsql:/etc/postfix/pgsql-virtual-mailbox-domains.cf
You should get ‘1’ as a result. That means your first mapping is working. Feel free to try that with other domains after the -q in that line. You should not get a response.You will now define the virtual_mailbox_maps. It will map a recipient’s email address (left-hand side) to the location of the user’s mailbox on your hard disk (right-hand side). Postfix has a built-in transport service called “virtual” that can receive the email and store it into the recipient’s email directory. That service is pretty limited, so we will delegate that to Dovecot as it allows us better control.
Postfix will forward all emails to Dovecot for further delivery. But we need to make sure that the recipient actually exists before we do that. So, Postfix needs to check whether an email address belongs to a valid mailbox. That simplifies things a bit because we just need the left-hand side of the mapping.Similar to the above virtual_domains mapping you need an SQL query that searches for an email address and returns “1” if it is found.
To accomplish that please create another configuration file at /etc/postfix/pgsql-virtual-mailbox-maps.cf:user = mailserver
password = uoDFE981mMpM0X996QNirfq4rJJ5ZR
hosts = 127.0.0.1
dbname = mailserver
query = SELECT 1 FROM virtual_users WHERE email=‘%s’
Tell Postfix that this mapping file is supposed to be used for the virtual_mailbox_maps mapping:
sudo postconf virtual_mailbox_maps=pgsql:/etc/postfix/pgsql-virtual-mailbox-maps.cf
Test if Postfix is happy with this mapping by asking it where the mailbox directory of our john@example.org user would be 1:sudo postmap -q john@example.org pgsql:/etc/postfix/pgsql-virtual-mailbox-maps.cf
virtual_alias_maps
The virtual_alias_maps mapping is used for forwarding emails from one email address to one or more others. In the database multiple targets are achieved by using multiple rows.Create another “.cf” file at /etc/postfix/pgsql-virtual-alias-maps.cf:
user = mailserver
password = uoDFE981mMpM0X996QNirfq4rJJ5ZR
hosts = 127.0.0.1
dbname = mailserver
query = SELECT destination FROM virtual_aliases WHERE source=‘%s’
Make Postfix use this database mapping:
sudo postconf virtual_alias_maps=pgsql:/etc/postfix/pgsql-virtual-alias-maps.cf
Test if the mapping file works as expected:sudo postmap -q jack@example.org pgsql:/etc/postfix/pgsql-virtual-alias-maps.cf
You should see the expected destination:john@example.org
7. Setting up Dovecot
This section of our journey leads us to Dovecot – the software that…- gets emails destined to your users from Postfix and saves them to disk
- executes user-based sieve filter rules (can be used to e.g., move emails to different folders based on certain criteria or to send automated vacation responses)
- allows the user to fetch emails using POP3 or IMAP
sudo groupadd -g 5000 vmail
sudo useradd -g vmail -u 5000 vmail -d /var/vmail -m
!include conf.d/*.conf
It loads all files in /etc/dovecot/conf.d/ that end in “.conf” in alphanumerical order. So “10-auth.conf” is loaded first and “90-sieve-extprograms.conf” is loaded last. The big advantage is that you can edit or replace parts of the configuration without having to overwrite the entire configuration. The main /etc/dovecot/dovecot.conf file does not require any changes. Those other files in conf.d/ however do./etc/dovecot/conf.d/10-auth.conf
The most common authentication mechanism is called PLAIN. However, if you have Outlook users then you may need to add the LOGIN mechanism, too.:auth_mechanisms = plain login
These two mechanisms would ask for a password without enforcing encryption to secure the password. But don’t worry. By default, Dovecot sets disable_plaintext_auth = yes which ensures that authentication is only accepted over TLS-encrypted connections.At the end of this file, you will find various authentication backends that Dovecot ships with. By default, it will use system users (those from the /etc/passwd). But we want to use the PostgreSQL database backend so go ahead and change this block to:
#!include auth-system.conf.ext
!include auth-sql.conf.ext
#!include auth-ldap.conf.ext
#!include auth-passwdfile.conf.ext
#!include auth-checkpassword.conf.ext
#!include auth-static.conf.ext
10-mail.conf
Change the mail_location setting to:mail_location = maildir:~/Maildir
This is the directory where Dovecot will look for the emails of a specific user. The tilde character (~) means the user’s home directory. That does not make sense yet. But further down on this page we will tell Dovecot what the home directory is supposed to mean. For example, john@example.org will have his home directory in /var/vmail/example.org/john.Further down in the 10-mail.conf file you will find sections defining the namespaces. Those are folder structures that your email program sees when connecting to the mail server. If you use POP3 you can only access the “inbox” – which is where all incoming email is stored. Using the IMAP protocol, you get access to a hierarchy of folders and subfolders. And you can even share folders between users. Or use a public folder that can be accessed by anyone – even anonymously. So, IMAP is generally to be preferred.
Also edit the “mail_plugins” line to enable the optional quota plugin and turn it into:mail_plugins = quota
10-master.conf
This configuration file deals with typical service ports like IMAP or POP3.Most settings are sane here and do not have to be changed. However, one change is required in the “service auth” section because we want Postfix to allow Dovecot as an authentication service. Make it look like this:
        # Postfix smtp-auth
        unix_listener /var/spool/postfix/private/auth {
          mode = 0660
          user = postfix
          group = postfix
        }
Well, Postfix runs in a chroot environment located at /var/spool/postfix. It can’t access anything outside of that directory. So, to allow communication with Postfix we tell Dovecot to place a communication socket into that chroot.
10-ssl.conf
You created both a key and a certificate file to encrypt the communication with POP3, IMAPs and HTTPS between the users and your mail server. You need to tell Dovecot where to find these files:ssl_cert = </etc/letsencrypt/live/webmail.example.org/fullchain.pem
ssl_key = </etc/letsencrypt/live/webmail.example.org/privkey.pem
ssl = required
Next let’s take a look at how Dovecot knows about users and their passwords:auth-sql.conf.ext
Dovecot reads the auth-sql.conf.ext which defines how to find user information in your database. Open the file. There are two sections:- userdb: where to find a user’s mailbox in the file system
- passdb: where to find the user’s hashed password
The “userdb” section already reads:
        userdb {
           driver = sql
           args = /etc/dovecot/dovecot-sql.conf.ext
        }
As you can see Dovecot uses an SQL database lookup to get that information. And it refers to the dovecot-sql.conf.ext file for more information. Let’s see…
/etc/dovecot/dovecot-sql.conf.ext
(This configuration file is one level up and not in “conf.d”.)You will find this file well documented although all configuration directives are commented out. Add these lines at the bottom of the file:
driver = pgsql
connect = \
host=127.0.0.1 \
dbname=mailserver \
user=mailserver \
password=uoDFE981mMpM0X996QNirfq4rJJ5ZR
user_query = SELECT email as user, ‘/var/vmail/%d/%n’ As home, 5000 AS uid, 5000 AS gid FROM virtual_users WHERE email=‘%u’
password_query = SELECT password FROM virtual_users WHERE email=‘%u’
Backslashes
Ending a line with a backslash (\) means that it is continued on the next line. It keeps the configuration more readable when it is split over multiple lines.What these lines mean:
- driver: the kind of database.
- connect: where to find the PostgreSQL database and how to access it (username, password)
- user_query: an SQL query that returns the user name (=the email address), the quota, the home directory, user ID and group ID.
- password_query: this SQL query just gets the password hash from the database
- email AS user
It gets the email field from the database which corresponds to the user name. Dovecot expects it in the user field so we set an alias to “user”. - userdb_home
This leads to the directory where all emails and various control files for this user are located. The placeholder ‘%d’ replaces the domain and ‘%n’ the user part. So, for John that makes it “/var/vmail/example.org/john”. - userdb_uid and userdb_gid
Those are the user ID and group ID of vmail user – 5000 for both. Dovecot uses it to set the permissions of files it creates. As all users share the same system user “vmail” this is just a static number.
Fix permissions
Make sure that only root can access the SQL configuration file so nobody else is reading your database access passwords:sudo chown root:root /etc/dovecot/dovecot-sql.conf.ext
sudo chmod go= /etc/dovecot/dovecot-sql.conf.ext
sudo systemctl restart dovecot
Run sudo journalctl -fu dovecot. You should see:dovecot[10637]: master: Dovecot v2.3.19.1 (9b53102964) starting up for imap, lmtp, sieve, pop3 (core dumps disabled)
systemd[1]: Started dovecot.service - Dovecot IMAP/POP3 email server.
8. Let Postfix send emails to Dovecot
In Section 7, we make sure that Postfix knows which emails it is allowed to receive. Now what to do with the email? It has to be saved to disk into the mailbox of the mail user who is eagerly waiting for it. You could let Postfix handle that using its built-in mail delivery agent (MDA) called “virtual“. However, compared to the capabilities that Dovecot provides like server-based sieve rules or quotas the Postfix delivery agent is pretty basic. We are using Dovecot anyway to provide the IMAP (and optionally POP3) service. So, let’s use its delivery agent.
How can we make Postfix hand over the email to Dovecot? There are generally two ways to establish that link.- Using the dovecot-lda (local delivery agent) process. It can process one email at a time. And it starts up a new process for every email. This was for long the default way. But as you can imagine that it does not scale well.
- The better option is to use LMTP (local mail transport protocol) that was conceived for this purpose. It can handle multiple recipients at the same time and has a permanently running process which provides a better performance than using the LDA. In short, LMTP is a variant of SMTP with fewer features. It is meant for email communication between internal services that trust each other.
You guessed it already – we will go for the second option. You installed the dovecot-lmtpd package earlier. So, let’s configure it.
Tell Dovecot where to listen for LMTP connections from Postfix
Edit Dovecot’s configuration file that deals with the LMTP daemon – you can find it at /etc/dovecot/conf.d/10-master.conf. Look for the “service lmtp” section and edit it so that it looks like:
        service lmtp {
          unix_listener /var/spool/postfix/private/dovecot-lmtp {
            group = postfix
            mode = 0600
            user = postfix
          }
        }
This makes Dovecot’s lmtp daemon create a UNIX socket at /var/spool/postfix/private/dovecot-lmtp. Just like in the section dealing with setting up Dovecot we make it put a socket into the /var/spool/postfix chroot directory because Postfix is restricted to that directory and cannot access anything outside of it. So from Postfix’s point of view the socket is located at “private/dovecot-lmtp”.
Restart Dovecot…
sudo systemctl restart dovecot
Check if dovecot accepted that change:systemctl status dovecot
The output should contain “Active: active (running)”.Tell Postfix to deliver emails to Dovecot using LMTP
This is even easier. The “virtual_transport” in Postfix defines the service to use for delivering emails to the local system. Dovecot has created a socket file and is ready to listen to incoming LMTP connections. We just need to tell Postfix to send emails there:sudo postconf virtual_transport=lmtp:unix:private/dovecot-lmtp
The syntax looks crazy, but it’s actually simple. You just told Postfix to use the LMTP protocol. And that we want to use a UNIX socket on the same system (instead of a TCP connection). And the socket file is located at /var/spool/postfix/private/dovecot-lmtp.Enable server-side mail rules
One feature of Dovecot is automatic rules for incoming email that are processed on the server. You can sort away your mailing list emails into special folders. You can reject certain senders. Or you can set up vacation auto-responders. No need to have a mail client running – it all happens automatically on the server even when your mail users are not connected.The open standard (RFC 5228) for such rules is called Sieve. Basically, Sieve is a way to manage server-side email rules. A rule consists of conditions and actions. For example, if the sender address matches steve@example.org you could tell Dovecot to move such emails to your “steve” folder automatically. These rules are stored on the Dovecot server and executed automatically. Whether you connect from your smartphone your laptop or use the webmail access – the rules always work and require no configuration on the client side.
As we use LMTP that’s where we need to tell the lmtp service that we want to use Dovecot’s “sieve” plugin. Edit the file /etc/dovecot/conf.d/20-lmtp.conf and within the “protocol lmtp” section change the “mail_plugins” line to:mail_plugins = $mail_plugins sieve
Restart Dovecot and you are done:sudo systemctl restart dovecot
9. Testing IMAP
You have already completed the configuration of Dovecot. So, fetching emails via IMAP should already work. Let’s give it a try using a simple-looking but powerful IMAP client: mutt.
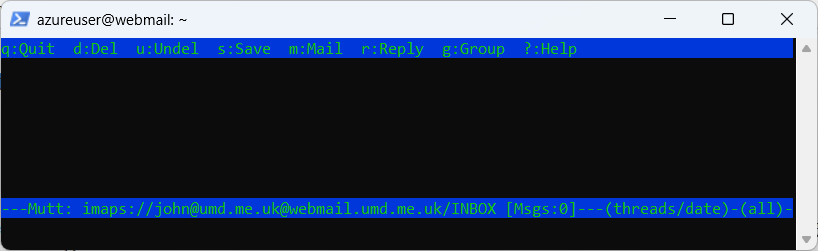
mutt -f imaps://john@example.org@**webmail.example.org**
The connection URL may look a little confusing because of the two “@” characters. Usually, mutt expects the format imaps://user@server. And as we use the email address as the “user” part you get this look.You should get prompted for the password which we set to “summersun”.
If you get any certificate warnings then check if you used the correct server name to connect to and if you completed the certificate/LetsEncrypt part earlier in this guide.After logging in you will see an empty inbox:
10. Testing email delivery
So far you have spent considerable time with theory and configuration. Are you worried whether all you did actually leads to a working mail server? Before we do the final steps let’s take a break and verify that everything you did so far works as expected.At this point the /var/vmail directory should be empty or maybe contain an “example.org” directory if you played with the john@example.org account previously. You can get a list of all files and directories within by running:
sudo find /var/vmail
Although there are not actually any emails on the server yet, you may still get something along the lines of:/var/vmail
/var/vmail/.bash_logout
/var/vmail/example.org
/var/vmail/example.org/john
/var/vmail/example.org/john/Maildir
/var/vmail/example.org/john/Maildir/dovecot-uidlist
/var/vmail/example.org/john/Maildir/new
/var/vmail/example.org/john/Maildir/dovecot-uidvalidity.697cfa2f
/var/vmail/example.org/john/Maildir/dovecot-uidvalidity
/var/vmail/example.org/john/Maildir/dovecot.list.index.log
/var/vmail/example.org/john/Maildir/maildirfolder
/var/vmail/example.org/john/Maildir/dovecot.index.log
/var/vmail/example.org/john/Maildir/tmp
/var/vmail/example.org/john/Maildir/cur
/var/vmail/.profile
/var/vmail/.cloud-locale-test.skip
/var/vmail/.bashrc
Each IMAP mail folder has three subdirectories:
- new – every file here is an email that was stored in this mail folder but not yet read
- cur – the same but for email that has been read already
- tmp – for temporary files from the mail server
- …/Maildir/new/… – the main inbox
- …/Maildir/.INBOX.reddit/new/… – the “reddit” mail folder below the inbox
- …/Maildir/.INBOX.servers.inga/new/… – the “servers”/”inga” mail folder below the inbox
Check Postfix
To check for obvious configuration error in Postfix please run:sudo postfix check
Send a test email
It is time to send a new email into the system. Now let’s send an email to John. My favorite tool for mail tests is swaks that you installed earlier. Run:
swaks --to john@example.org --server localhost
Run the following command to see what the mail server is doing:
sudo journalctl -n 10 -u dovecot
The line you are looking for looks like:dovecot[10976]: lmtp(john@example.org)<11396><gf56HE37fGmELAAATRJD4g>: msgid=<20260130184117.011384@webmail.example.org>: saved mail to INBOX
Your output may look slightly differently. If everything worked as expected Postfix has accepted the email and forwarded it to Dovecot which in turn wrote the email in John’s maildir. If you get any errors in the log file then try to understand the error message and find the cause of the problem before you proceed.Look again:
sudo find /var/vmail/example.org/johnDoes it look like this:
/var/vmail/umd.me.uk/john
/var/vmail/umd.me.uk/john/Maildir
/var/vmail/umd.me.uk/john/Maildir/dovecot-uidlist
/var/vmail/umd.me.uk/john/Maildir/new
/var/vmail/umd.me.uk/john/Maildir/new/1769798477.M505403P11396.webmail.umd.me.uk,S=700,W=720
/var/vmail/umd.me.uk/john/Maildir/dovecot-uidvalidity.697cfa2f
/var/vmail/umd.me.uk/john/Maildir/dovecot-uidvalidity
/var/vmail/umd.me.uk/john/Maildir/dovecot.list.index.log
/var/vmail/umd.me.uk/john/Maildir/dovecot.index.cache
/var/vmail/umd.me.uk/john/Maildir/maildirfolder
/var/vmail/umd.me.uk/john/Maildir/dovecot.index.log
/var/vmail/umd.me.uk/john/Maildir/tmp
/var/vmail/umd.me.uk/john/Maildir/cur
You can also use a slightly more comfortable tool to access Maildirs that will come handy for you as a mail server administrator: “mutt”.
sudo mutt -f /var/vmail/example.org/john/Maildir
(You may get asked to create /root/Mail – this is standard procedure. Just press Enter.)
What you see now are the contents of John’s mailbox:
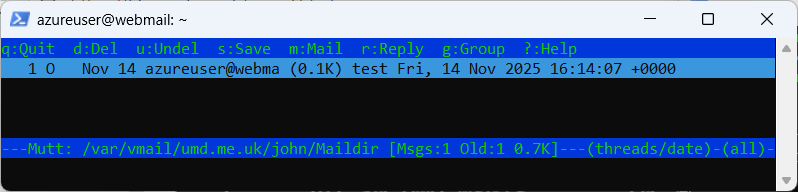
Using mutt is a nice way to check mailboxes while you are logged in to the mail server.
To reiterate what happens when you receive an email:- Postfix receives the email (using the “swaks” command in this example – but usually through the network using the SMTP protocol from other servers)
- Postfix talks to Dovecot via LMTP and hands over the email
- Dovecot runs through the user’s Sieve rules
- Dovecot writes the email file to disk
This tutorial covers how to set up email server to receive email and send email from the server. Refer to the following instruction “Email relay” regarding how to configure the email server to relay email from end users.