A mail server on Windows
This tutorial covers how to set up a mail server to receive and send email.
The minimum hardware required to install and run email server on Windows is: 2 VCPU, 1 GB of RAM and 3 GB of disk space. An advantage of using your own mail server is that you can easily set up a contact form and let users send email to you from there.1. Opening ports
To set up a mail server, you'll need to open specific ports to allow incoming and outgoing mail traffic. The ports you need to open depend on the email protocols you plan to use. The most common email protocols are SMTP (Simple Mail Transfer Protocol) for sending emails and IMAP (Internet Message Access Protocol) or POP3 (Post Office Protocol) for receiving emails. Here are the ports typically associated with these protocols:SMTP:
Port 25: This is the default port for SMTP. It's used for outgoing mail (sending emails).IMAP:
Port 143: This is the default port for IMAP, which is used for receiving emails. It's not secure and is typically used with STARTTLS or SSL/TLS encryption.Port 993: This is the secure IMAP port, which is used when IMAPS (IMAP over SSL/TLS) encryption is employed.
POP3:Port 110: This is the default port for POP3, used for receiving emails without encryption.
Port 995: This is the secure POP3 port, used when POP3S (POP3 over SSL/TLS) encryption is employed.In this tutorial, we use all of them, so need to open the following ports:
- SMTP (inbound): Port 25, Port 465 (SMTPS), Port 587 for secure email submission by clients
- IMAP (inbound): Port 143, Port 993 (with SSL/TLS)
- POP3 (inbound): Port 110
- SMTP (outbound): Port 25 (Optional. It is blocked by many cloud providers. Hetzer will unblock it after 1 month.)
Go to your web portal and open the above ports. Additionally, Open HTTP (inbound): Port 80 and HTTPS (inbound): Port 443 for web service.
2. Installation of software
First, increase the virtual memory of virtual machine (Initial size: 1500 MB, maximum size: 4000 MB). Remove background images in “Make the computer easier to see” in control panel > Ease of access.
We must install a series of software: hmailserver, Apache, PHP, PHPMailer, and Win-ACME.
Apache
1) Install the latest C++ Redistributable Visual Studio 2015-2022: https://aka.ms/vs/17/release/VC_redist.x64.exe
2) Download Apache files (e.g., for Windows from https://www.apachelounge.com/download/VC15/) and unzip them (archive httpd-2.4.54-win64-VC15.zip) to C:\ so the directory is C:\Apache24\ directory.
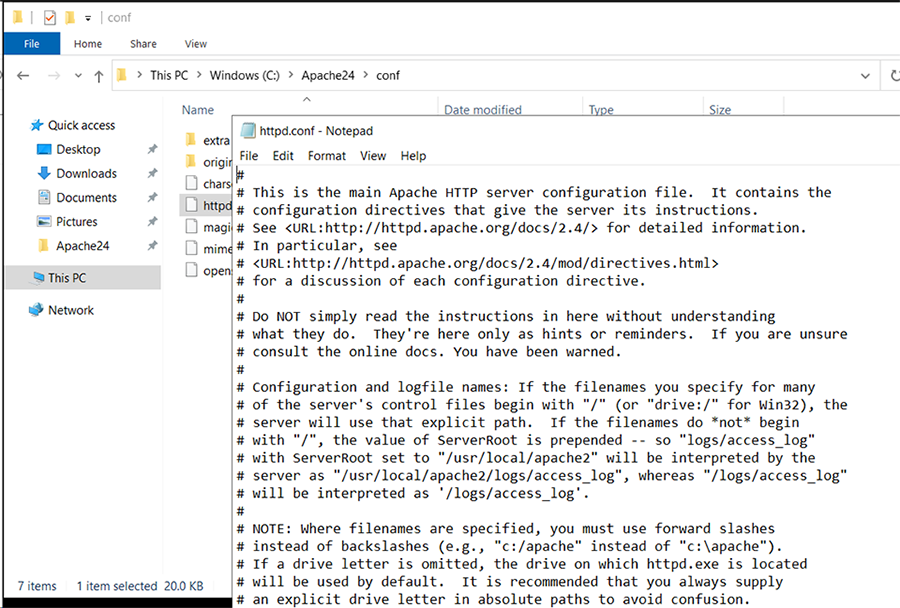
3) After unzipping, go to the folder c:\Apache24\conf\ and open the httpd.conf file with a text editor.
4) Change
#LoadModule rewrite_module modules/mod_rewrite.so
to
LoadModule rewrite_module modules/mod_rewrite.so
5) Register Apache service:
cd C:\Apache24\bin\
httpd -k install
It outputs:
    Installing the 'Apache2.4' service
    The 'Apache2.4' service is successfully installed.
    Testing httpd.conf....
    Errors reported here must be corrected before the service can be started.
Add inbound firewall rule for port 80 (HTTP) and port 443 (HTTPS). For email service, add inbound rule for port 25 (SMTP), 110 (POP3), 143 (IMAP), 465 (SMTPS), 587 (SMTP submission), 993 (IMAPS), 995 (POP3S). Add outbound firewall rule for port 25 (SMTP). Restart the server.
6) Open a web browser, type your IP address (http://172.173.177.185), you should see “It works!”.
PHP
Visit windows.php.net - /downloads/releases/archives/ and download an appropriate version of PHP for your computer operating system. Generally, you can download any stable version, and this instruction is based on 7.4.33 for Windows. Make sure you modify the folder name for the version in the following steps.1) Download PHP package php-7.4.33-Win32-vc15-x64.zip and unzip under C:\php74.
2) Rename php-ini-development.ini to php.ini, and open it, remove “;” to uncomment the following line (and may change the path if needed):
extension_dir = "c:/php74/ext/"
3) Add PHP in system environment variable.
setx path “%PATH%; C:\php74” /M
(or, set the path in Windows’ System Properties, Environment Variables, then System variables).4) Again, open the file c:\Apache24\conf\httpd.conf and append at the end of file with lines:
AddHandler application/x-httpd-php .php
AddType application/x-httpd-php .php .html
LoadModule php7_module "C:/php74/php7apache2_4.dll"
PHPiniDir "c:/php74"
5) Restart Apache services.
6) Now you can access your PHP page from default Apache document root, which is c:\Apache24\htdocs if you follow the previous steps.
7) In Notepad++, create a file phpinfo.php with the following codes in the folder c:\Apache24\htdocs.
<?php phpinfo(); ?>
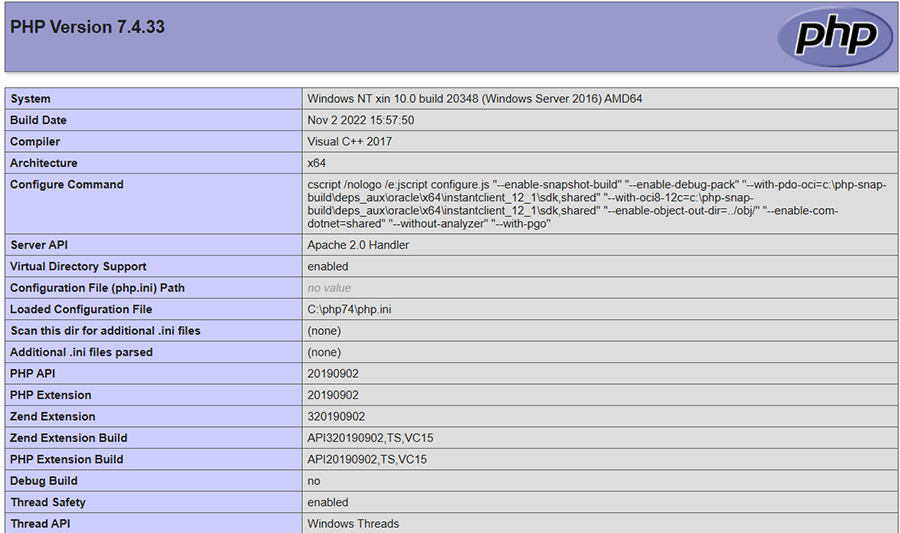
8) Then in the web browser, type http://172.173.177.185/phpinfo.php. You should see the following page, which indicates your PHP installation is correct.
9) Open php.ini, find and uncomment the following line:
extension=openssl.dll
If you want to include PostgreSQL extension, you need to copy libpq.dll from php74\ to Apache2.2*\bin. And restart the service.
hMailServer
Download the latest version of hMailServer and install it. We must install .NET 2.0 before installing hMailServer. Go to Server manager > Feature > .NET framework 3.5 (Includes .NET 2.0 and 3.0), and enable it. You can then go ahead and install hMailServer:
- In the Select Components window, ensure that full installation is chosen. Server and Administrative components must be checked.
- In the Select database server type window, check the built-in database engine.
- In the hMailServer Security window, create a password for the default user.
Specify A record and MX records for your domain, so you can add the domain in hMailServer.
Add two accounts as well: admin and ali. Set their password as required.
In hMailServer, email messages are primarily stored within the hMailServer data directory, which is typically located at C:\Program Files (x86)\hMailServer\Data. The specific location for an individual user's email within this directory is determined by the user's account name and domain, often within a folder structure like /data/domain/user. While the database contains metadata about the messages, the actual message files are stored in the data directory.PHPMailer
- To send the email to the recipient, you will use PHPMailer class which is a full-featured email creation and transfer class for PHP. It allows you to set featuring file attachments, SMTP servers, CCs, BCCs, HTML messages, word wrap, and more.
- Download PHPMailer (6.X) from Github (https://github.com/PHPMailer/PHPMailer)
Thunderbird
It is full-featured IMAP mail clients. It can display HTML and is very helpful to test IMAP mail servers.3. Getting a LetsEncrypt certificate
There are many ways to install letsencrypt certificate. The following way is for Windows:
Download Win-acme from win-acme:To get the certificate in the correct format for Apache (i.e. .pem files), you have to active the PemFiles plugin for each of your renewals. For new renewals this can be done either from the command line with --store pemfiles or from the main menu with the M option, where it will be posed as a question (“How would you like to store this certificate?”).
Getting the certificate in .pem format
- Choose M in the main menu (create with full options)
- Choose “Manually input host names” as source
- Input the domain name (e.g., mail.umd.me.uk)
- Choose or accept the friendly name
- Pick a validation method. Most common would be to save to a local path
- Pick your key type
- Now the critical part: at “How would you like to store this certificate?” pick Write .pem files to folder (Apache, nginx, etc.)
Since we want to use the SSL certificate on our Apache webserver, we will choose option 2 PEM encoded files (Apache, nginx, etc.) and hit enter. Once PEM is selected it will ask you where to store those files. In our case it’s C:\Apache24\conf.
Configuring Apache
To use certificates obtained with the help of WACS with the Apache 2.4 server, you need to make settings in Apache24\conf\extra\httpd-vhosts.conf file; you could also make these changes in the \Apache24\conf\extra\httpd-ssl.conf file as well instead if you so wish:
    Define CERTROOT "C:/Apache24/conf/"
    Define SITEROOT "C:/Apache24/htdocs/"
    <VirtualHost *:443>
        ServerName www.example.com
        DocumentRoot "${SITEROOT}"
        SSLEngine on
        SSLCertificateFile "${CERTROOT}/example.com-chain.pem"
        SSLCertificateKeyFile "${CERTROOT}/example.com-key.pem"
    </VirtualHost>
Obviously replace example.com with your actual domain name your siteroot to where you’re hosting your files.
Enable SSL
Uncomment (remove the #) these lines in Apache24\conf\httpd.conf file:LoadModule socache_shmcb_module modules/mod_socache_shmcb.so
LoadModule ssl_module modules/mod_ssl.soInclude conf/extra/httpd-ssl.conf
You also need to add Listen 443 or Listen 80 443.
Configure SSL for the newly issued certificate
Open the httpd-ssl configuration file located here
C:/Apache24/conf/extra/httpd-ssl.conf
Change the SSLCertificateFile:
SSLCertificateFile "${SRVROOT}/conf/server.crt"
With
SSLCertificateFile "${SRVROOT}/conf/mail.umd.me.uk-chain.pem"
Change the SSLCertificateKeyFile :
SSLCertificateKeyFile "${SRVROOT}/conf/server.key"
withSSLCertificateKeyFile "${SRVROOT}/conf/mail.umd.me.uk-key.pem"
Change the SSLCipherSuite:
SSLCipherSuite HIGH:MEDIUM:!MD5:!RC4:!3DES
SSLProxyCipherSuite HIGH:MEDIUM:!MD5:!RC4:!3DES
SSLCipherSuite ECDH+AESGCM256:ECDH+CHACHA20:DH+AESGCM256:ECDH+AES256:DH+AES256:!aNULL:!MD5:!DSS
SSLProxyCipherSuite ECDH+AESGCM256:ECDH+CHACHA20:DH+AESGCM256:ECDH+AES256:DH+AES256:!aNULL:!MD5:!DSS
Change SSL protocol
SSLProtocol all -SSLv3
SSLProxyProtocol all -SSLv3
SSLProtocol all -SSLv3 -TLSv1 -TLSv1.1
SSLProxyProtocol all -SSLv3 -TLSv1 -TLSv1.1
Change VirtualHost
# General setup for the virtual host
DocumentRoot "${SRVROOT}/htdocs"
ServerName www.example.com:443
ServerAdmin admin@example.com
ErrorLog "${SRVROOT}/logs/error.log"
TransferLog "${SRVROOT}/logs/access.log"
# General setup for the virtual host
DocumentRoot "${SRVROOT}/htdocs"
ServerName mail.umd.me.uk
ServerAdmin admin@umd.me.uk
ErrorLog "${SRVROOT}/logs/error.log"
TransferLog "${SRVROOT}/logs/access.log"
Save the changes. Check the Apache configuration on the command prompt. Start command prompt with administration permission. Run the following command:
cd C:/Apache24/bin
httpd.exe -t
If everything is OK. Restart Apache webserver via command prompt. Start command prompt with administration permission. Run the following command:
cd C:/Apache24/bin
httpd -k restart
Verify that SSL is working
Visit the website on your browser.
4. Testing IMAP
You have already completed the configuration of web and email server. So, fetching emails via IMAP should already work. Let’s give it a try using an outside email address sending message to your account.5. Testing email delivery
So far you have spent considerable time with theory and configuration. Are you worried whether all you did actually leads to a working mail server? Before we do the final steps let’s take a break and verify that everything you did so far works as expected.At this point the C:\Program Files (x86)\hMailServer\Data directory should be empty or maybe contain an “example.org” directory if you played with outside email sending message to you previously. You can get a list of all files and directories within it:
You may get some data like:C:\Program Files (x86)\hMailServer\Data\umd.me.uk\ali\30\{30307BCF-02B7-4BD2-81E5-D8FAFBA4F5C9}.eml
You can open it with Outlook or Thunderbird.Basically, the schema you see here is C:\Program Files (x86)\hMailServer\Data\DOMAIN\USERID\…
To reiterate what happens when you receive an email:- hMailServer receives the email (through the network using the SMTP protocol from other servers)
- hMailServer writes the email file to disk.
6. Set up the server to send emails
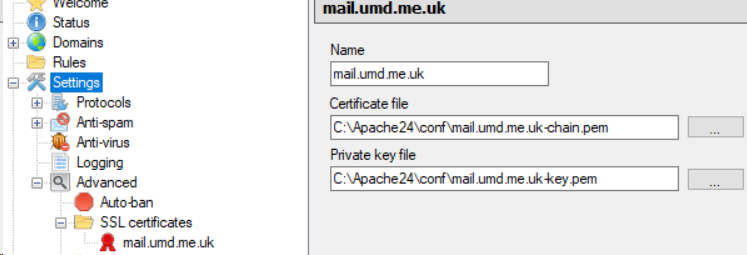
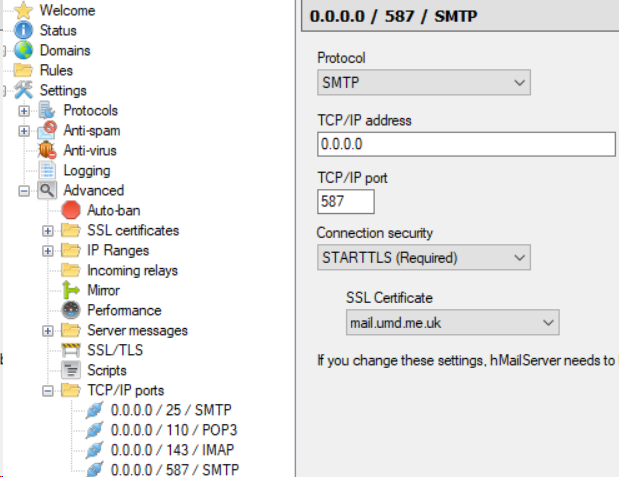
So far, we install the software and set up the server to receive emails. We also need to setup the server to send emails. You may specify SSL certificates as follows:
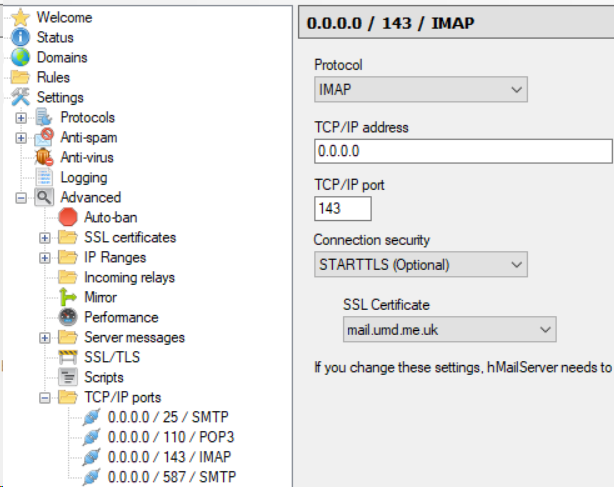
Similarly, You may need to specify SSL certificates for ports 143 and 587 as well:
You can now go ahead and use PHP mailer to send message to yourself or others on the same domain. The settings to send email to others could be as follows:
$mail->isSMTP(); //Send using SMTP
$mail->Host = 'tls://mail.umd.me.uk'; //Set the SMTP server to send through
$mail->SMTPAuth = true; //Enable SMTP authentication
$mail->Username = 'ali@umd.me.uk'; //SMTP username
$mail->Password = 'abc'; //SMTP password
$mail->SMTPSecure = PHPMailer::ENCRYPTION_STARTTLS; //Enable explicit TLS encryption
$mail->Port = 587; //TCP port to connect to;
//Recipients
$mail->setFrom('ali@umd.me.uk', 'UMD MSGIS');
$mail->addAddress('admin@umd.me.uk', 'Xin Tao'); //Add a recipient
Use an email management software, such as Thunderbird or Outlook, and login using your account along with your password. Once you login, you should be able to see the mail in the mailbox.