A Linux server on Hetzner
In this tutorial, you will learn how to create a Linux server on Hetzner.
Task 1: Create an Hetzner account
As a new Hetzner, you are eligible for a $20 discount. You can create an account through the promotional link here: https://hetzner.cloud/?ref=TOmrsMdmfCLf. Follow the prompts to create a new account with your email, verify identity, and fill in profile information. Note that you might be asked for your ID information and credit card number, which is a normal process to get an account in Hetzner.
Task 2: Set up SSH key (Optional)
To set up public-key authentication, follow the instructions below.Open Windows Powershell, and run the following command to generate SSH keypair.
ssh-keygen -t rsa -b 4096
Where:- -t stands for type. The above command generates an RSA type keypair. RSA is the default type.
- -b stands for bits. By default, the key is 3072 bits long. We use a 4096 bits key for stronger security.
    PS C:\Users\xtao> ssh-keygen -t rsa -b 4096
    Generating public/private rsa key pair.
    Enter file in which to save the key (C:\Users\xtao/.ssh/id_rsa): test
    Enter passphrase (empty for no passphrase):
    Enter same passphrase again:
    Your identification has been saved in test
    Your public key has been saved in test.pub
    The key fingerprint is:
    SHA256:zapwdxFru4dE+o5uaqUqpRTjskjafHjWWly1xwDLcJ4 ad\xtao@GEOGLT075
    The key's randomart image is:
    +---[RSA 4096]----+
    |      . o        |
    |       = +       |
    |        E +      |
    |  o      +.*     |
    | . o    SoB o    |
    |..o .. .oo.+     |
    |+* +..+oooo.     |
    |+ * +++o.oo..    |
    |   =o+o+o.o.     |
    +----[SHA256]-----+
- The private key (your identification) will be saved under your user directory.
- The public key will be saved in the .pub file.
Task 3: Create a server
In the Hetzer, create a new server by following these steps:
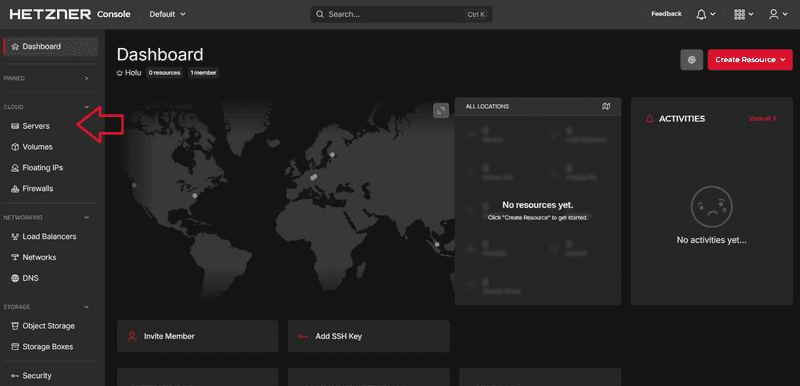
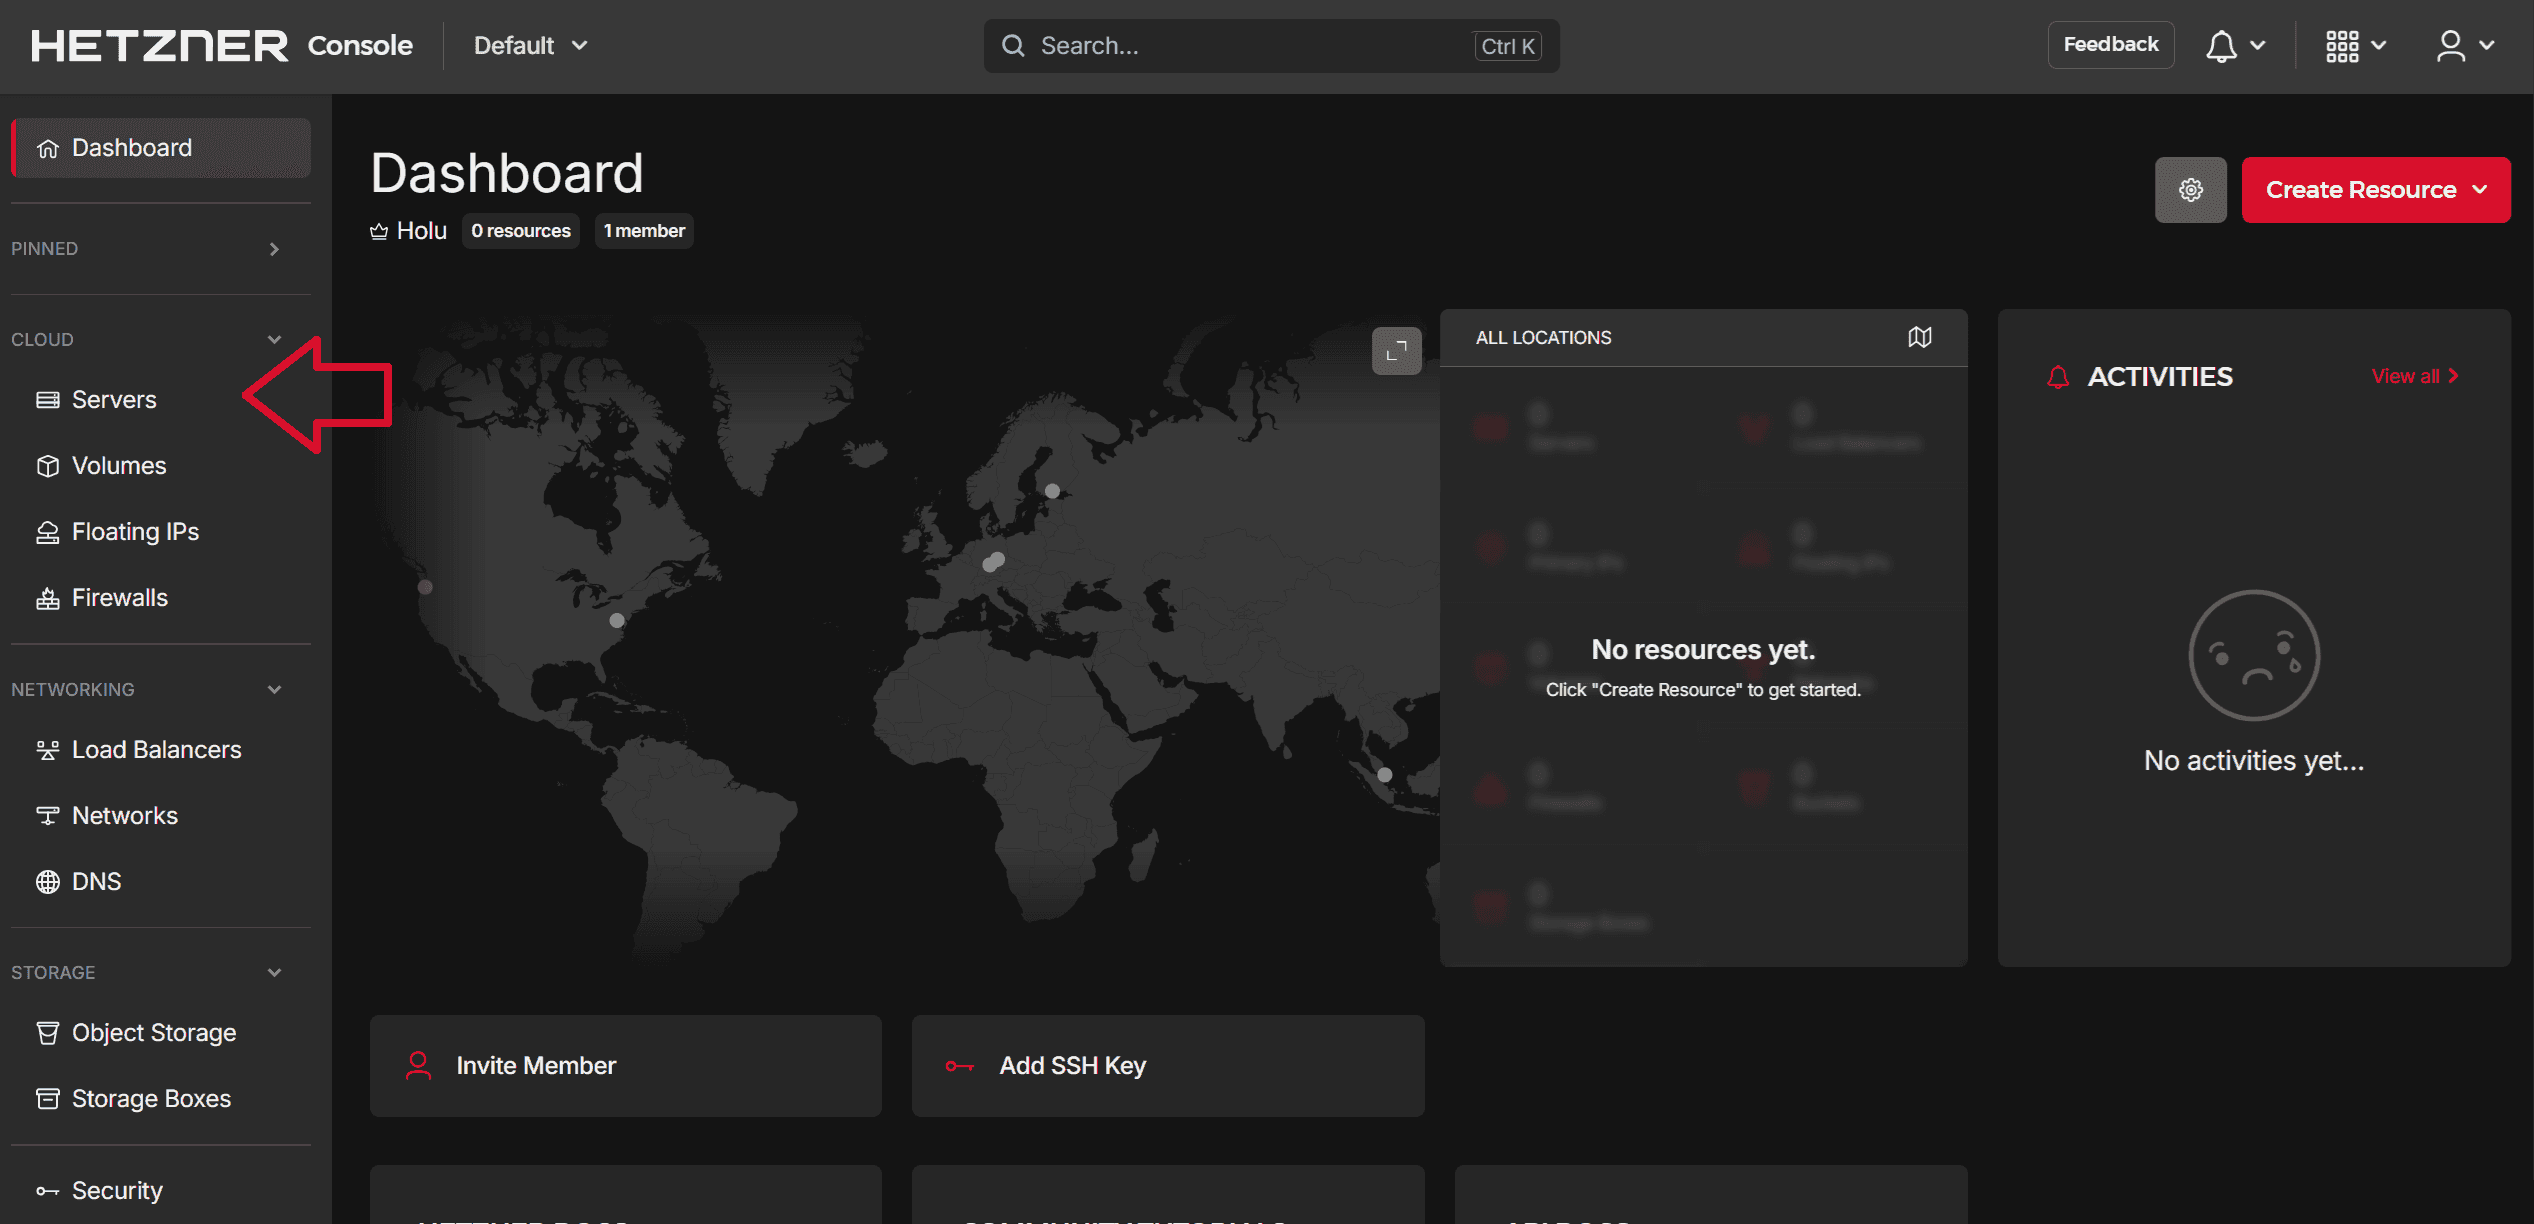
First, create a new project, and then create new resource > Servers
Select Add server

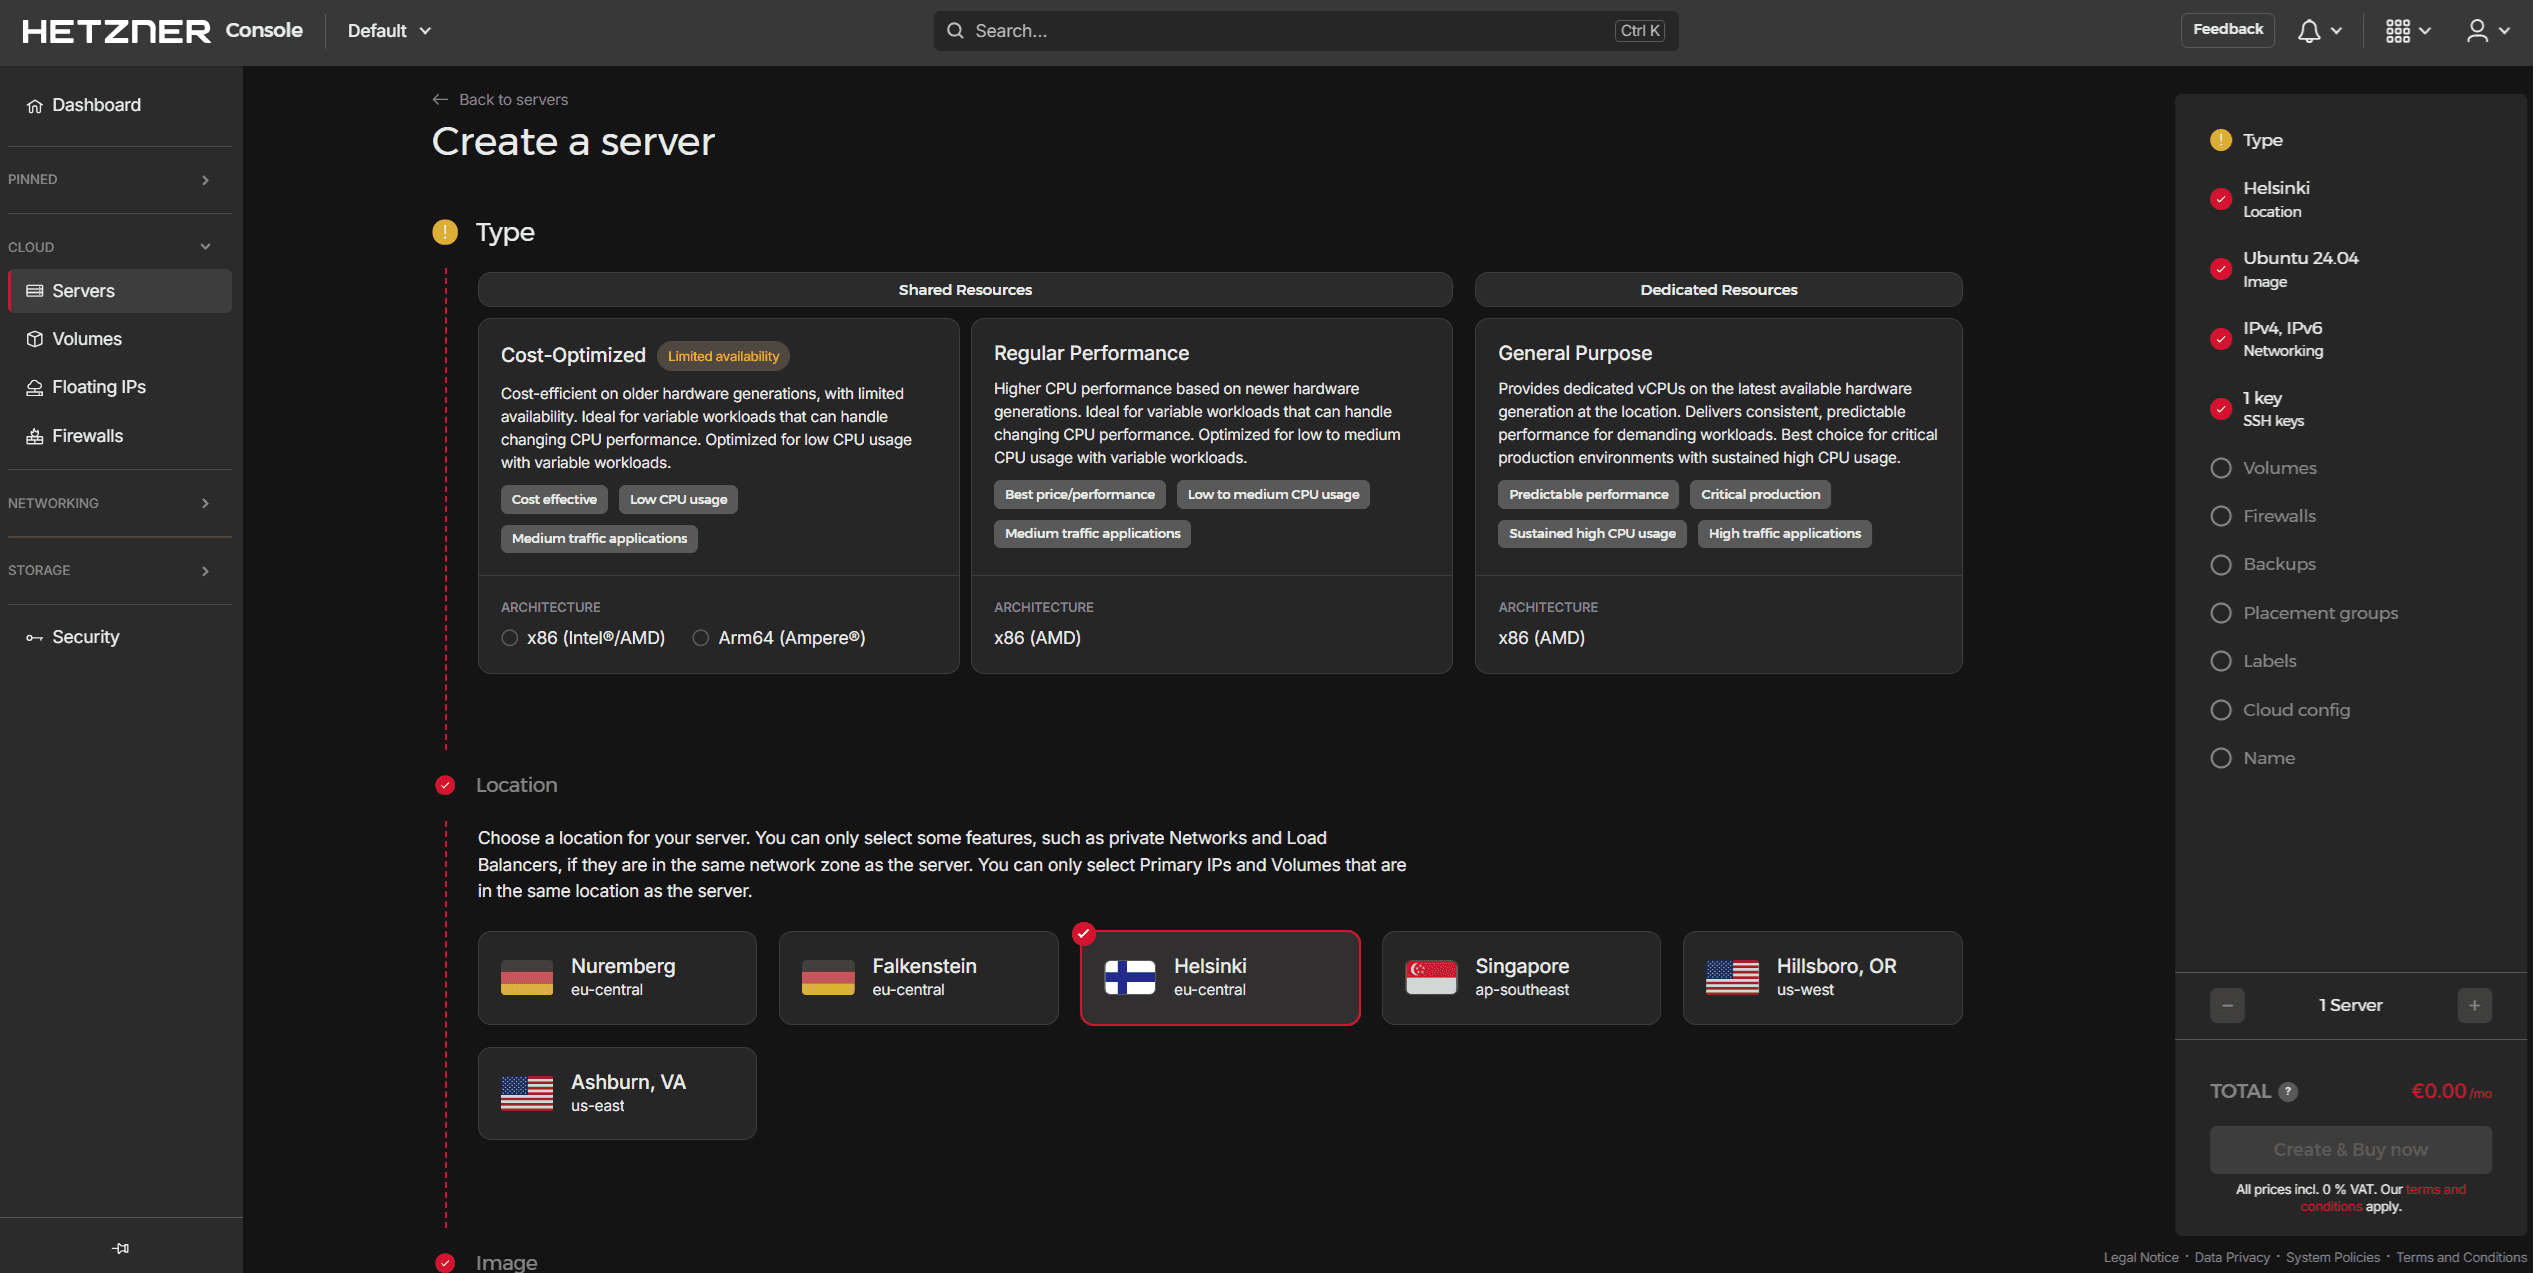
Set your server type. A suggested one is Regular Performance. Choose the region to be Hillsboro, OR (us-west), and choose Ubuntu Server 22.04 as the Image. Your settings may look like the figure below.
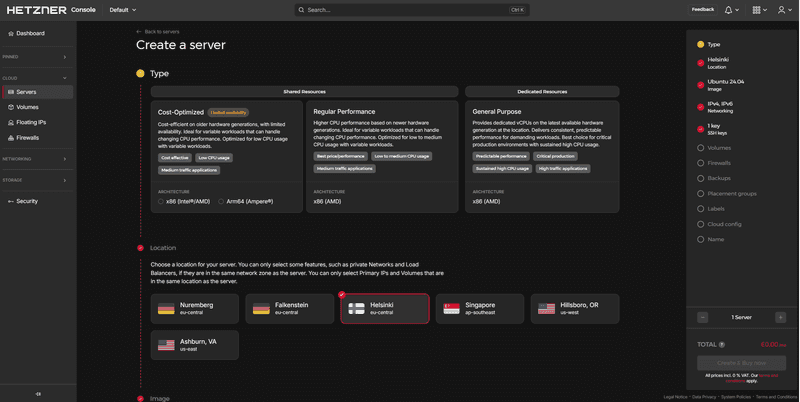
If you have SSH key, add SSH key. Otherwise, you will receive the root password via email. Finally, give your server a name, and click Create & Buy now button.
- You have now created an Hetzner server! In the next section, you will access the new machine.
Task 4: Connect to the Server
To connect to an Hetzner server from Windows or Mac, you can use SSH. Here are the steps to connect to a Hetzner server from both Windows and Mac.- Open the Command Prompt or PowerShell on your Windows computer or Terminal on Mac.
- Type the connection string like the following format:
ssh -i ~/.ssh/id_rsa.pem user@135.235.160.38
An example for connection is as follows:
ssh -i osrmOpen root@135.235.160.38
Note: if you do not have SSH key setup, use the following format:
ssh root@135.235.160.38 - Hit enter key to connect to the server.
Task 5: Opening the HTTP and HTTPS Port
In order to make websites available to the outside world, we need to allow Internet traffic to find it. Computers communicate to each other through “ports,” or specific addresses that a piece of software uses to either 1) listen for data or 2) send out data. For HTTP, the protocol used for web servers, this is traditionally port number 80. By default, ports are closed for security reasons – a port should not be open unless it has a purpose. Your next step is to tell Hetzner to open the port so that your server can communicate with the outside world over HTTP.To open port 80 and 443 in an Hetzner, follow these steps:
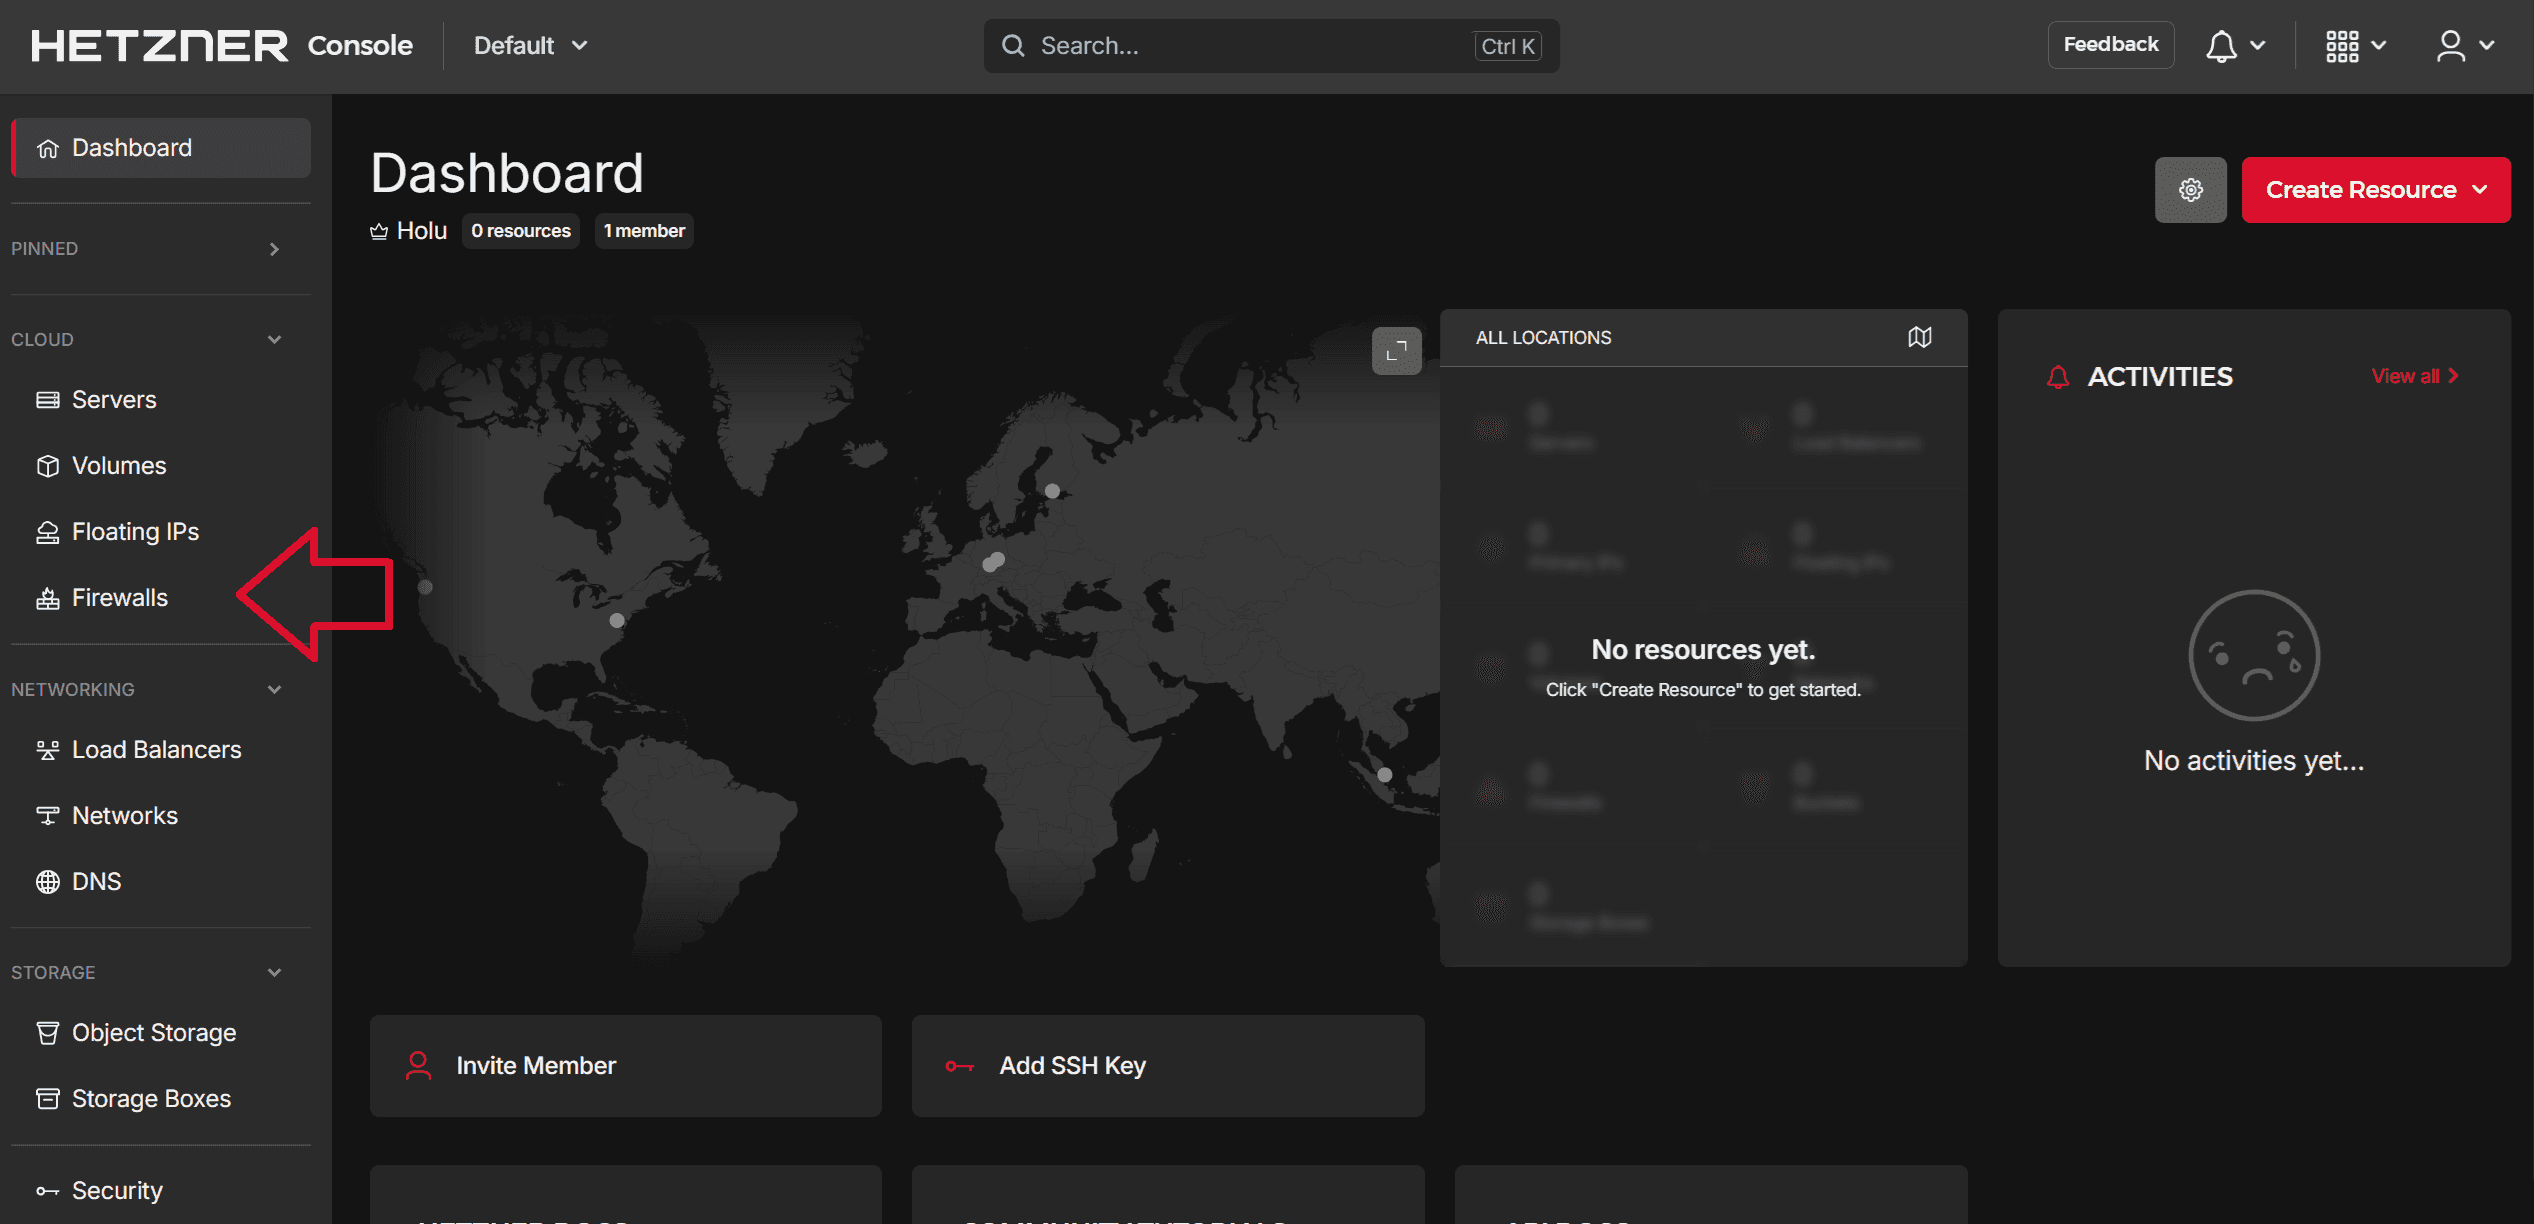
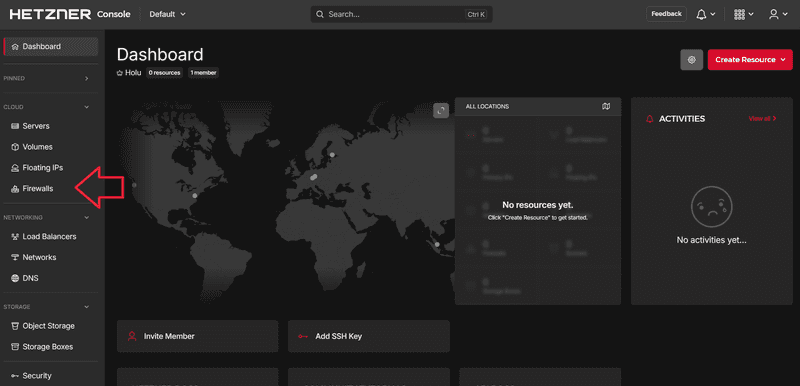
Go to Firewalls on the left menu bar
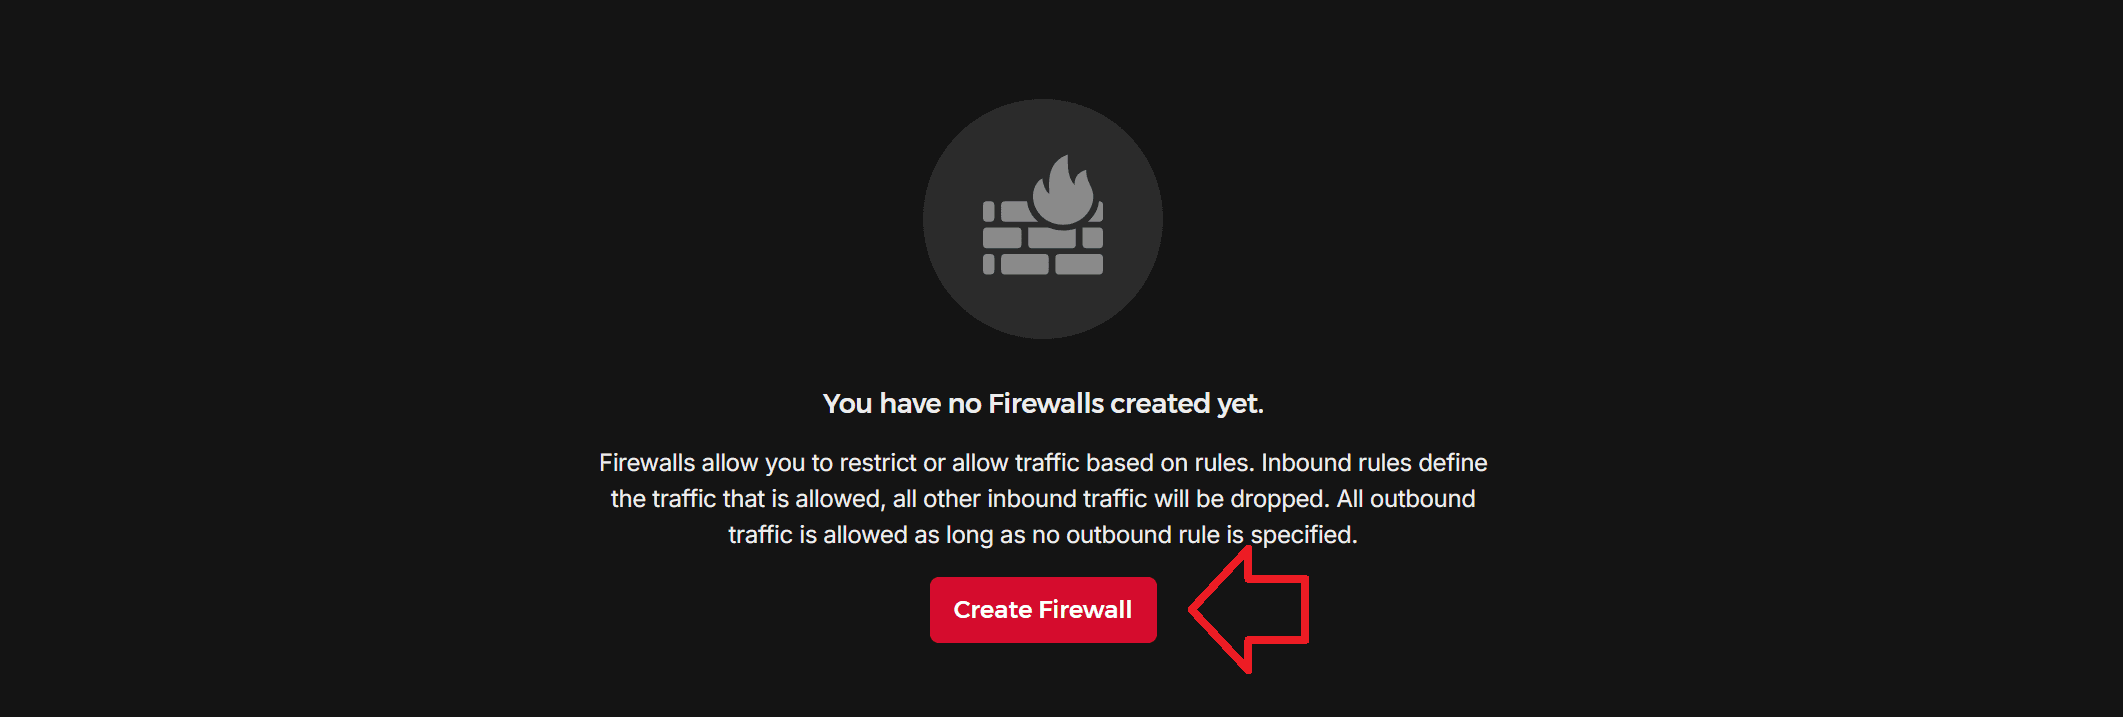
Select Create Firewall

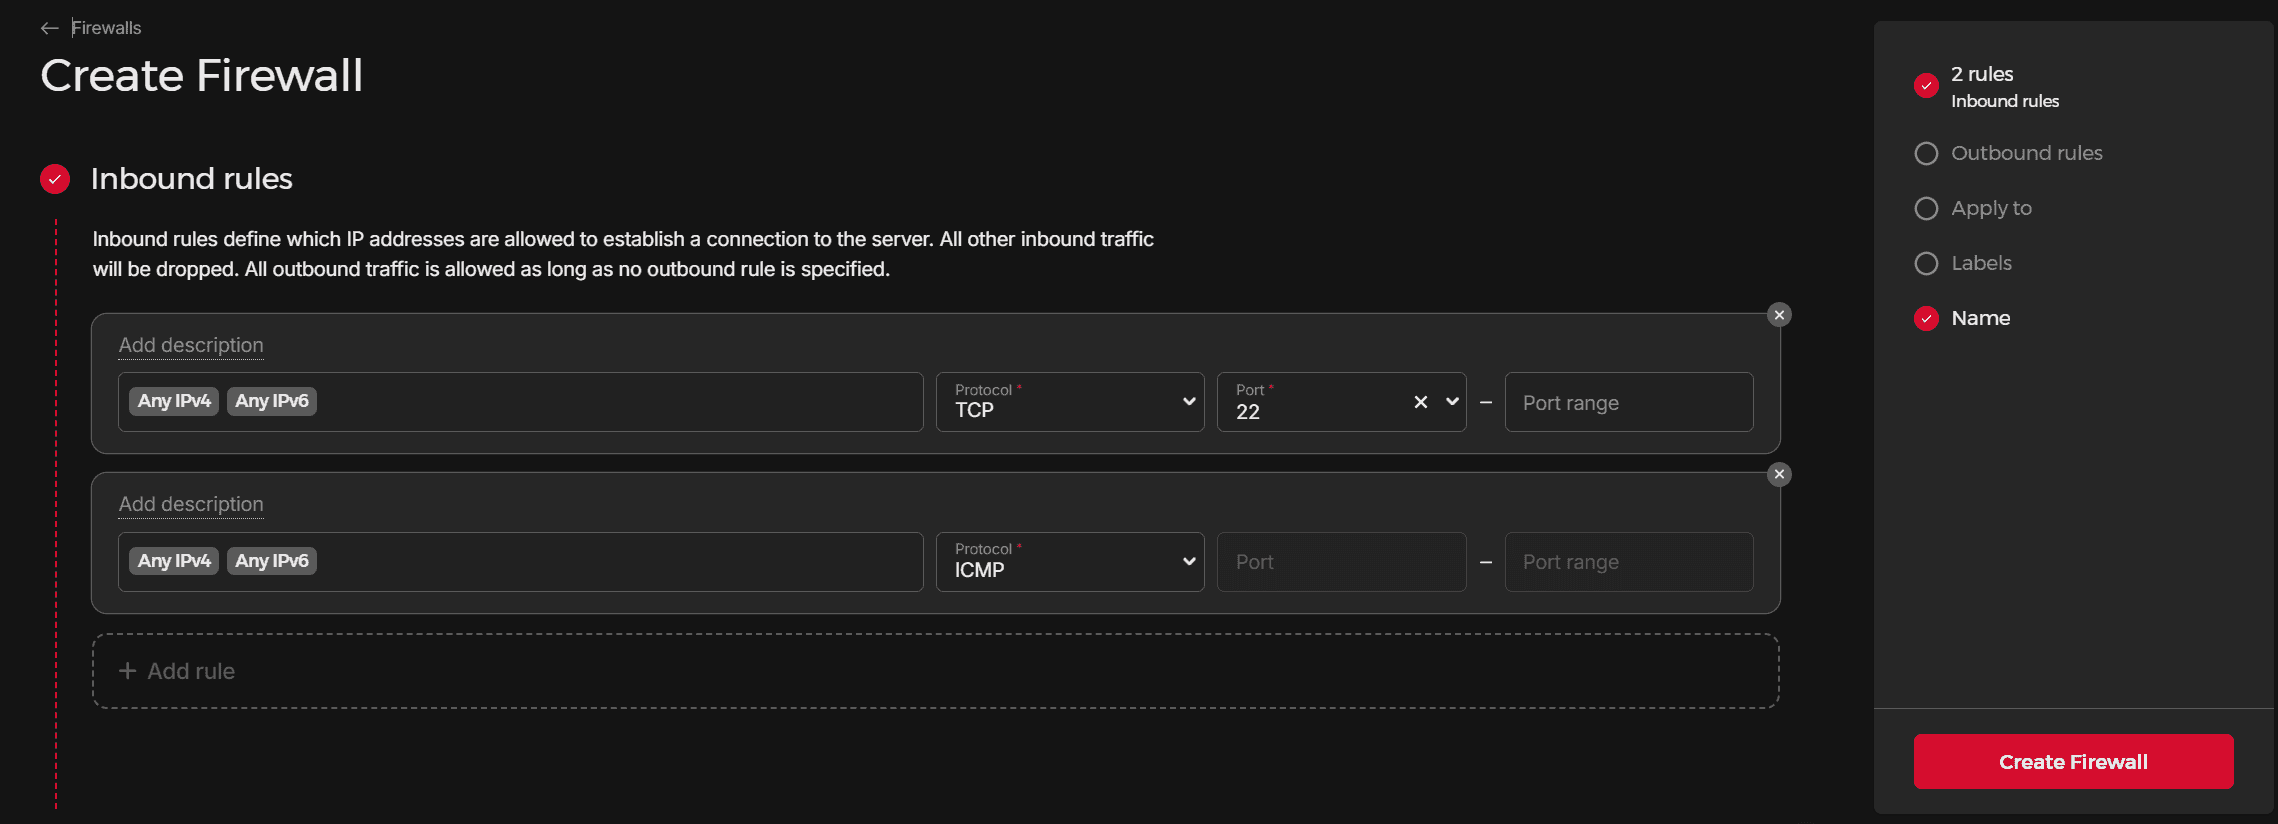
Create your Firewall

- Click on the "Add rule" button to add a new inbound security rule.
- In the "Add description" dialog box, modify destination port ranges. Set this to "80", which is the default for HTTP traffic.
- Similarly, add another rule for port 443.
- Finally, give your firewall a name.
- Go to your server details, and click Firewall tab, and then Apply Firewall button
- Choose your defined firewall, and then click Apply 1 Firewall.